In this post, we share a DIY fireplace surround that saved us from a big, expensive project.
The Home Green is reader-supported and may receive a commission if you decide to make a purchase through a posted link, at no cost to you.
When you move into a new space and find something you don’t like, it’s tempting to just rip it out and put in something new that you prefer. With a little thought and creativity, however, you just might save yourself some scratch while doing the planet a solid, as well.
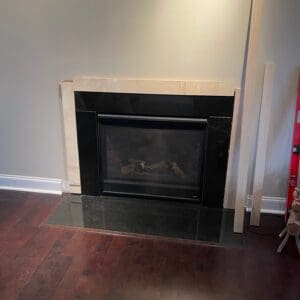
That was the case with this fireplace that was never quite what we wanted – too dark, and the mission style didn’t match the rest of the house. Over the years, I researched tearing the whole thing out and putting in something lighter and brighter, but I could never pull the trigger on prioritizing this project. The options I really loved were thousands of dollars and the cheapest prefab fireplace surround kits looked cheap and I knew they would be a temporary and wasteful solution.
Fast forward to us finally tackling one of my top of list (and top of budget) projects: removing a load bearing wall in the center of our house to open up our kitchen to our living room. This living room just happened to contain the dark and dreary fireplace, thus moving that project higher on the list, as well.
So with the wall removed (yay!) it was time to figure out what to do about the fireplace. I didn’t mind the black granite on the base/hearth where it blended pretty well into our dark flooring but I thought if we could at least remove the black granite from the surround, it would help brighten things up a bit.
Surprising DIY fireplace surround discovery
I went on a search for new ideas for a mantel and surround and came across a surprising solution – a DIY project. Among the expensive solutions I was bookmarking I was surprised to find that one of my favorite options was a beautiful fireplace surround pictured on Young House Love. I was surprised that a DIY option could look so good. The simple, modern design had the same vibe as many of the stone options that I was coveting but with a much more affordable price.
Even better, this design could cover the black granite, rather than requiring that it was removed. This meant that we could continue to reuse the entire fireplace, minimizing our waste while getting a whole new look.
Planning for our DIY fireplace surround
I’m lucky that my husband is pretty handy so I showed him the blog post and he said he could make it happen. There were a few things we had to consider first, though:
- Safety – In the Young House Love post, the fireplace was non-functional. Our gas fireplace, while not used often, is functional so it was important for us to figure out if this design was safe. We did research with the manufacturer and learned that this type of design would work as long as we didn’t butt the wood right up against the metal of the gas fireplace insert. We aligned our plan with the manufacturer's safety requirements and proceeded.
- Proportions – Our fireplace and the room it’s in were not exactly the same as the blog so we had to make some adjustments to our plan. In our case, this meant making the surround just slightly wider all the way around. I was nervous that it wouldn’t look right at a different width but this was necessary to work with the existing fireplace.
- Baseboard – In the YHL version, they overlap a baseboard that runs along the bottom of the final surround. Because our fireplace was already so low to the ground and because of its functionality the bottom needed to remain open, so we had to figure out how to handle this portion in a way that would still look good. In addition, we had the existing baseboards on either side and the hearth to contend with and figure out how the design would intersect at the bottom.
Demolition of the old fireplace surround and mantel
The first step in our plan was demo. I was hoping there was some way we could reuse or repurpose the wood from the original mantel but the way it was constructed and attached to the wall, it had to be cut apart for removal leaving nothing salvageable. Luckily, though, with careful removal, we were able to save the drywall behind it. While some patching would be in our future, it would not need to be completely replaced.


Getting started on the DIY fireplace surround
With the bare wall exposed, we set about building the surround. I have to confess that I was only involved in this step in a consulting capacity, but I’m pretty tight with the carpenter and was able to follow along with what he did.
For the most part, we followed the basic design of the Young House Love version. The one change that my woodworking husband decided upon was not mitering the corners of the interior panels of the surround. He felt like keeping the large mitered joints tight and looking good over time with a solid hardwood would be difficult. Since our plan was to paint the whole thing white, it seemed unnecessary.
He explained to me that mitered corners are great when you are looking to hide any end-grain or do a continuous grain match all around, for example on a display box or picture frame. Since in this case this was not necessary, the panels were joined using simple tongue and groove joints.
Making some changes to the plan
The final dimensions were 11.25” on the top and sides. The main reason we went slightly wider vs the YHL instructions is that in order to keep the hearth as is, we needed to consider how the new fireplace surround would butt up against it.
I felt like it would look best if the edge of the fireplace either overlapped with the edge of the hearth or lined up perfectly. I wanted to avoid it being narrower than the hearth. Interestingly enough, due to an adjustment in the width of the outside edge pieces, we ended up coming just short of the hearth but I think it ended up being okay.
The wood used was poplar, locally sourced from a small lumber mill not far from us that specializes in domestic wood species, local to eastern Pennsylvania. Poplar takes paint well, and since we decided to paint it to match our trim,, a more expensive species of wood would just be a waste of money since you wouldn’t see its character.
The details of our project
The interior panels started off as 4/4 rough poplar milled down to 3/4 inches thick and cut to final dimensions. The trim pieces that finish off the exterior and interior sides of the panels started off as 8/4 poplar, and were then milled and trimmed down to final dimensions – 1.75” deep and 1” wide for the exterior trim and .75” for the interior pieces.
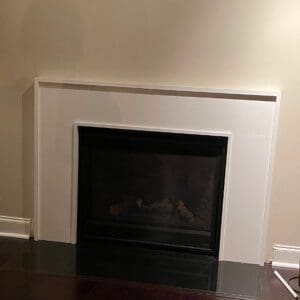
The interior panels were assembled as one unit and then attached to the existing wall with some spacer blocks and shims (as needed) behind it to build out the wall depth to the depth of the existing granite surround, and to allow for a deeper profile. The trim pieces that surround the outer/inner sides of the surround panels were all cut to size to fit, mitered 45 degrees on the corners, and attached.
The final step was adding .75″ cove molding to the inside of the exterior trim. We thought that we might like to keep the whole design more modern and leave the cove molding off but when we got to this point, we agreed that this little extra flourish made it look more complete.
The way the entire structure is constructed and attached makes it easy to remove/disassemble in the future should tastes or design changes to the larger space, or the fireplace insert itself, necessitate a different design approach.
Although the process wasn’t overly complicated for my husband, if the YHL dimensions will work for you, that is an easier route to go since their version uses lumber in standard sizes. You could fairly easily swap out the mitered corners in their plan with tongue and groove joints if you desired.
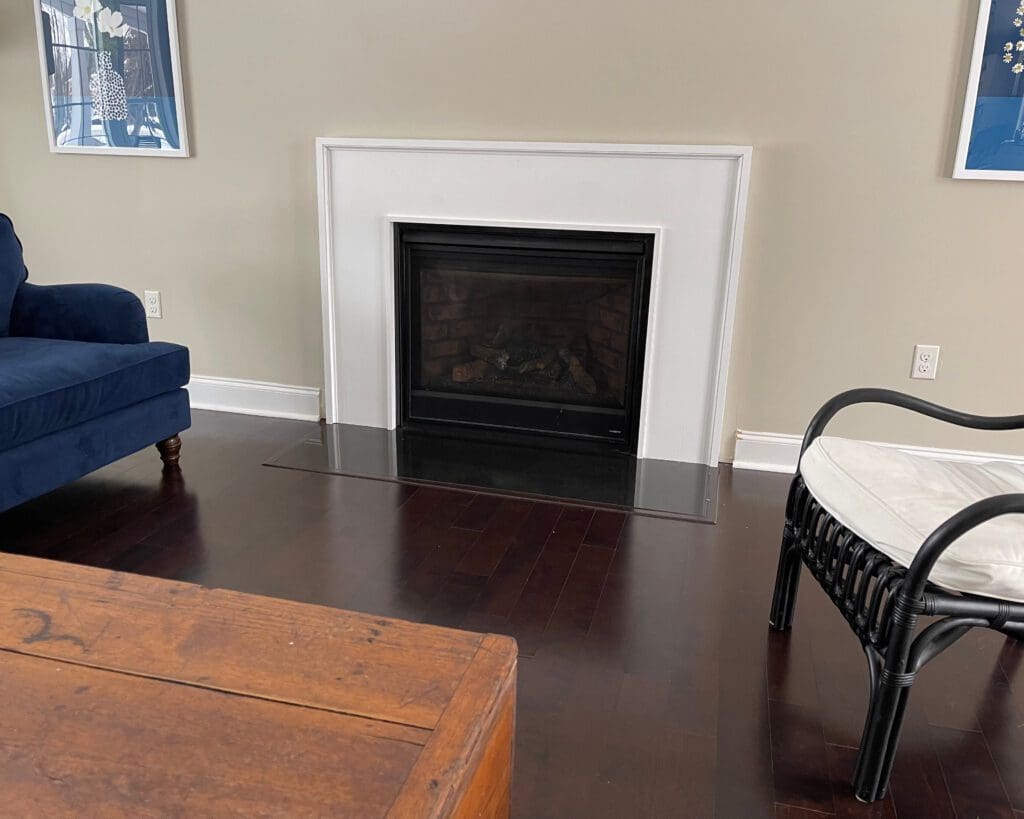
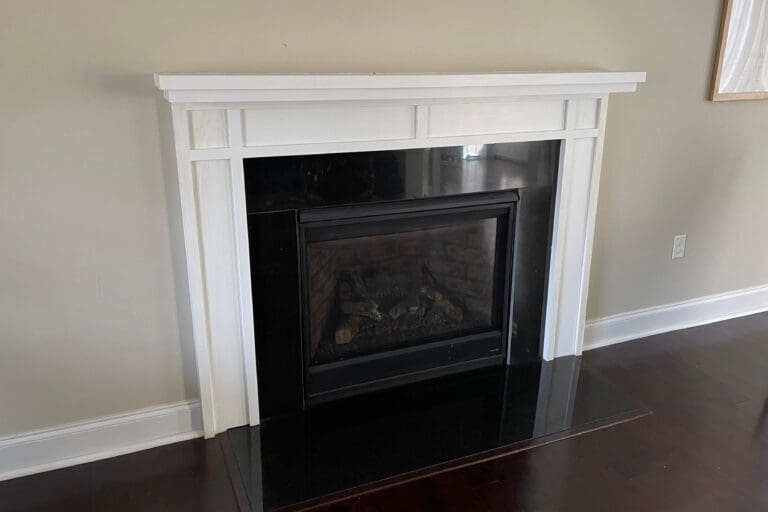
The result: our finished DIY fireplace surround
We love the final result which is much more modern and streamlined. Even better, it was a pretty inexpensive project that minimized the waste we incurred versus switching out the entire fireplace. I’m glad we embraced some slow design principles and didn’t rush right out to buy something prefabricated because with a little time and thought, we ended up with the perfect result.

FAQs on building a wood fireplace surround
How can I make a DIY fireplace surround or similar project more eco-friendly as possible?
This DIY fireplace surround project helped us learn a few things about how to make home improvement carpentry projects more sustainable.
- Look for locally sourced: Choose wood that is sourced locally to minimize the environmental impact associated with transportation. Local sourcing supports the regional economy and reduces carbon emissions.
- Certifications: Look for wood products certified by reputable organizations such as the Forest Stewardship Council (FSC) or the Programme for the Endorsement of Forest Certification (PEFC) that can help you find wood that was responsibly sourced.
- Supplier Transparency: Choose suppliers that are transparent about their sourcing practices. Ask questions about where the wood comes from, how it is harvested, and whether it adheres to sustainable forestry practices.
- Species Selection: Opt for wood species that are abundant and grow quickly. Avoid using wood from endangered or slow-growing species like tropical and exotic woods, as this contributes to deforestation and biodiversity loss.
- Treatment and Finishes: Check if the wood has been treated with environmentally friendly finishes and coatings. Avoid wood treated with harmful chemicals, as they can have negative effects on indoor air quality and the environment.
- Longevity: Choose wood that is durable and long-lasting to minimize the need for replacements or repairs. This contributes to the overall sustainability of the project.
- Reclaimed or recycled Wood: Using reclaimed or recycled wood is an eco-friendly option as it reduces the demand for new logging. Look for suppliers or salvage yards that offer reclaimed wood from old buildings or structures.
Wondering how to DIY fireplace surround?
Like us, if you can’t find a DIY fireplace surround plan online that will meet your needs without some adjustments, you may need to make your own. We were lucky to have the YHL plan as a base, and found that following a few steps made the rest possible. The basic steps to DIY a fireplace surround include:
- Measurements: Measure the width, height, and depth of your fireplace to determine the appropriate size of your fireplace surround. Consider the proportions of your room and the size of your existing furniture to create a fireplace surround or mantel that complements the space. In our project, we ended up needing to expand the width of the fireplace surround. By keeping all 3 sides the same width, the final result still looked balanced and in proportion.
- Design: Decide on the design and style of your DIY fireplace surround. Research different styles and gather inspiration from magazines, websites, or social media platforms.
- Select materials: Choose the materials for your DIY fireplace surround based on your design and budget. We would encourage you to factor sustainability into your selection – we’ve included our tips on sustainable carpentry projects above. Consider recycled ceramic tile if your project involves tile elements!
- Preparation: Prepare the area where you will install the surround. Remove any existing fireplace surround, mantel or trim, patch any holes or damage in the wall, and paint or wallpaper the area as desired. Ensure the wall is sturdy and able to support the weight of your materials.
- Construction: Follow your design and cut the materials to the appropriate sizes. Use a combination of screws, adhesive, and brackets to secure the mantel to the wall. Ensure the mantel is level and secure before moving on to the next step.
- Finishing: Sand the pieces to smooth any rough edges or surfaces. Apply a stain, paint, or sealant based on your desired finish and the type of material you're using. Allow the finish to dry completely before moving to the final step of your DIY fireplace surround project.
- Decorating: This is the fun part! Once the fireplace surround is complete, decorate it with your favorite items such as artwork, candles, mirrors, or seasonal decor. In our case, since the mantel is minimal, there’s not much decorating to be had but we’ve already figured out a way to incorporate stockings over the holidays – where there’s a will, there’s a way!
Free tips and inspiration in your inbox
Stay up to date on the latest news in sustainable interior design! Enter your email address below to be included on our newsletter distribution list.